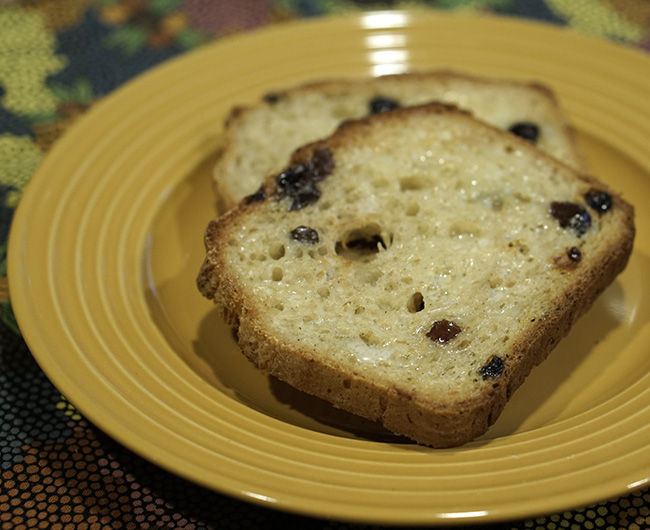
Gluten Free Raisin Bread

 Avg. rating 5 from 9 votes.
Recipe Information
Ingredients
Directions
If not using instant yeast, proof the yeast in the warm water (110 to 115 °F) and a tsp of the sweetener - add the yeast to the water and sweetener, stir; allow it to get poofy. If using instant yeast, it will get tossed in with the flours as it does not need to proof - and in fact won't proof and you will think it's dead and not working!
Put raisins in a heatproof container and cover with boiling water. I just chuck them in my glass 2 cup measure. This will plump up the raisins. If you like drier raisins, you can skip the plumping step.
Whisk together the dry ingredients - flours/starch, xanthan, salt and instant yeast. Do this in the bowl of your stand mixer fitted with the paddle attachment.
Add the liquid to the dry ingredients - water or proofed yeast mixture, melted fat, remaining honey/agave, and mixed egg replacer. Beat until a smooth batter forms. This will not be like a wheat based bread dough. It will more like a thick muffin batter.
Drain raisins and add, stir in to combine.
Scrape the dough into a lightly oiled loaf pan lined with parchment paper. I oil my pan, then lay in a sling of parchment that fits in the bottom and goes up and over both of the long sides, then oil the parchment. Smooth evenly using wet fingers. Place pan in a warm spot and allow to rise. Do not overproof or it will collapse on itself. If the top starts cracking, it's time to bake! I set a timer and check it around 30 min.
Meanwhile, preheat your oven to 350 °F.
When bread has risen, you can carefully brush it with a little melted margarine for an extra yummy and shiny crust. This was a trick that my dad always did when he baked raisin bread. He'd rub the loaves with butter when they came out of the oven. I like to do it before.
Bake on middle rack until it sounds hollow when thumped -- about 45 minutes. I like my bread crusty, so I remove the bread from the pan and return it to the oven directly on the rack for another 10 minutes. If desired, rub top crust with any remaining melted butter or margarine while it's still warm. Remove to a wire rack and allow to cool completely before slicing with a long serrated knife.
To freeze slices: place squares of waxed or parchment paper between slices, place in an airtight container or ziplock bag and freeze. You will then be able to pop out individual slices as needed.
Notes
I measure my flours by weight, so I make this up as a "mix" and store it in my pantry. I weigh out the flours, starch, and xanthan gum into a ziplock bag. I make up 4 or 5 at a time so I don't have to pull all the flours out every time I want to make a loaf. I just have to gather up the other ingredients. This has the same dry ingredient base as my Gluten Free Sandwich Bread.
Copyright © 2013 Kathy Przywara. All rights reserved. The copyright of this recipe is retained by the original recipe creator. If you would like to publish this recipe elsewhere in print or online, please contact us to find out how to obtain permission.
Substitutions
I often use 1 Tbsp ground flax meal mixed with 4 Tbsp boiling water instead of the Ener-G Egg Replacer mixture. Prepare this first and allow to cool while measuring the rest of the ingredients. This will add "flecks" to the bread and gives a chewier texture.
This recipe can be vegan by selecting vegan options - agave nectar or brown rice syrup for the sweetener and a vegan margarine, shortening, or coconut oil for the melted fat.